I’ve wanted to make a baked vegan cheesecake for a while now, and was uncertain as to which method to use. Cashews? Tofu? Coconut cream? In the end I went with a combination of cashews and siken tofu, as I figured it would be a nice compromise in terms of taste (coconut and cashew being two relatively strong flavours). I tried this recipe out on my fellow co-op members, and they loved it so I figured I would post the recipe here in case anyone wants to recreate/innovate on it! This one is a simple vanilla and recipe flavour combination, a classic. I think it would work just as well with chocolate, coffee, caramel, citrus flavours, passion fruit.. Pretty much anything you can imagine really! Just be aware that agar will not work with citrus as it is pH sensitive and citrus fruits are markedly acidic.
Ingredients (for a 30cm diametre cheesecake)
Base
- 350g of digestive biscuits (or biscoff buiscuits for an interesting twist)
- 130g of margarine or vegan butter (I use Becel)
Vanilla filling
- 350g of silken tofu, or one small package
- 150g of cashews, soaked overnight or rested in boiled water for 10 min
- 110ml of oat cream (can use any type of vegan liquid cream)
- 110ml of maple syrup (or agave)
- 100g of muscovado/brown sugar
- 2 tsp of vanilla bean powder/paste or liquid extract, adjust to taste
- a pinch of salt
Raspberry jam topping
- 250g of frozen raspberries
- 100g of sugar
- 75ml of water
- 1/2 tsp of agar agar powder (You could probably skip that if you use enough sugar, or use gelatin if you’re not vegan)
- 3-5 tbsp of lemon juice, according to taste
Method
Start by preheating your over to 180°C/175°C fan. Roughly crumble the biscuits between your hands as you put them into a blender/food processer together with the melted margarine or butter. Blend until just combined. Alternatively crush the biscuits by hand and combine with the margarine in a bowl by hand.
Grease a round spring tin then cut out a round piece of baking paper that just fits into the bottom circle of the tin. Line and then close the tin and compact the base mixture onto the base first with your hands and then with a flat bottom glass to make sure it’s compacted properly. If the base is too thick, allow for the base to form small edges around the sides.
Bake for about 30 minutes or until the base is hard and starting to colour. Allow to cool for a little while after getting out of the oven, and turn down your oven to 160°C (do not use fan for this part).
Meanwhile, give your blender a wash and add all the filling ingredients. Blitz until completely smooth, taste to adjust the flavour if necessary. Don’t worry if it tastes a little cashew-like at this point, that will disappear during the cooking process.
Add the filling to the tin, and bake for 1-2h or until the cake has risen slightly, formed some cracks on the top and most importantly have only a very slight wobble in the middle. If you are unsure whether it is too raw or not, put it back for another 10 minutes (better too set than runny). My cheesecake took 1½h to cook through, but the time will depend greatly on the size of your tin.
While the cake is baking (preferably within what you expect to be the last half an hour), prepare the raspberry jam: To a small pot, add the raspberries, water, agar and sugar. Heat up on medium/high until the mix starts to simmer, then reduce the heat a little and start adding the lemon juice, spoonful by spoonful and keep tasting until you find it satisfying. Keep on low heat, mixing frequently until the jam has a liquid and homogenous consistency.
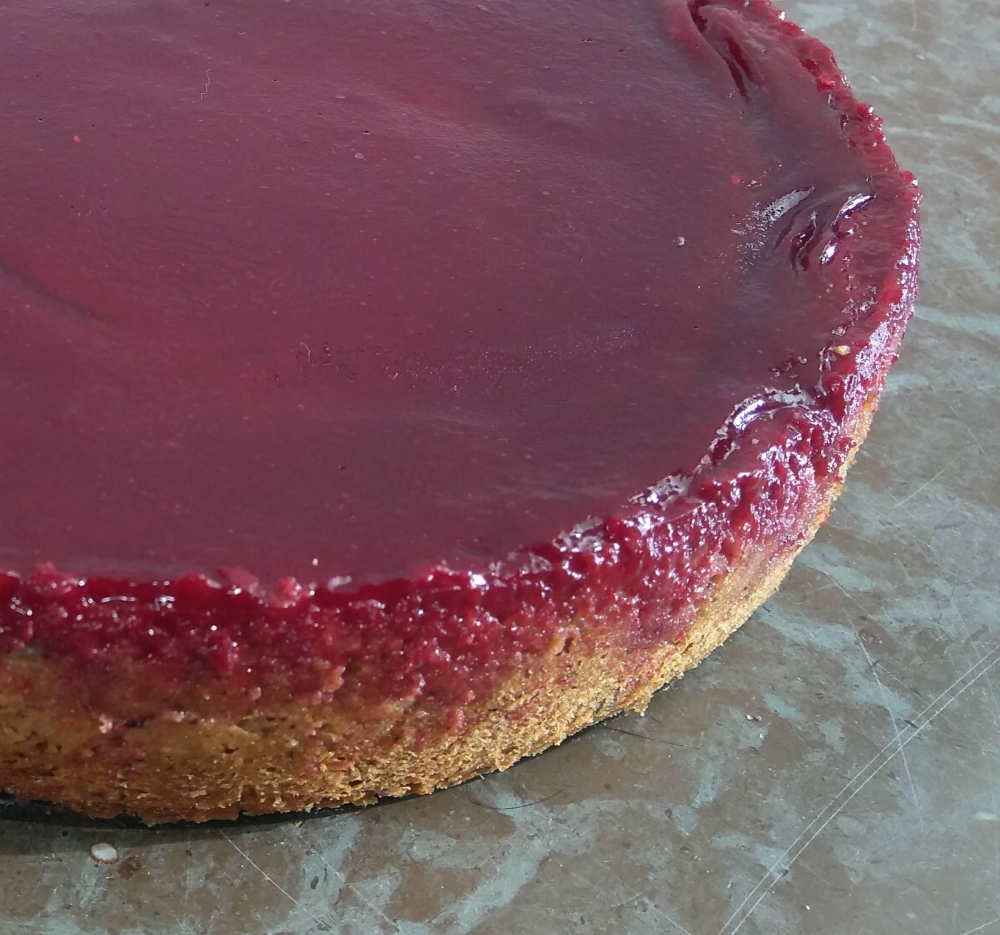
Once the cheesecake is out of the oven, allow to cool and strain the jam through a fine mesh sive to get rid of the raspberry seeds (or not, up to you) and then pour on top of the cheesecake as an equal layer.
Allow to set in the fridge for at least 5 hours before serving, preferably 7-8h.
Serve as is!
I apologise for the lack of a picture showing the inside, I was not able to do that as the cake was served at an event! I will update the post next time I make this cake, with a picture of a slice 🙂
I hope you will enjoy this simple recipe!
Until next time
